Following the previous piece about SSRS Installation, this article will take us through the configuration of SQL Server Reporting Services Configuration.
Step 1
You can either click on “Configure Report Server” at the end of your SSRS installation or simply open “Report Server Configuration Manager” from the Start menu.
Step 2
You will select the SQL server on which you are about to configure SSRS and test the connection. Once connection testing is successful, you may proceed & click on Next.

You will now have to provide a database name that you will be running your reporting services on. Also choose your language (here we opt for English (US)). Then click Next.

You will be taken to the Credentials tab where you will be asked to choose the “Authentication Type” which we are selecting to be “Service Credentials” which will by default lock your username and password. Then click Next.
You will now be brought to the Summary tab which basically summarizes all your inputs & selections throughout this configuration wizard so far. Then click Next after reviewing all the information provided so far.
On the next tab, your configuration progress will be displayed and if all operations are successful you will see the screen as shown below. Then you click on Finish to complete the first part of your configuration.
Step 3
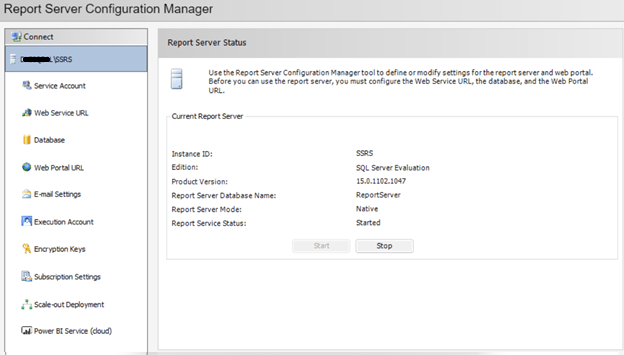
After completing the first part of your configuration, you will be taken to next part of the configuration wizard where you will first select the SQL server instance for which you are looking to configure the SSRS. Then click on the Connect button to establish your connection.

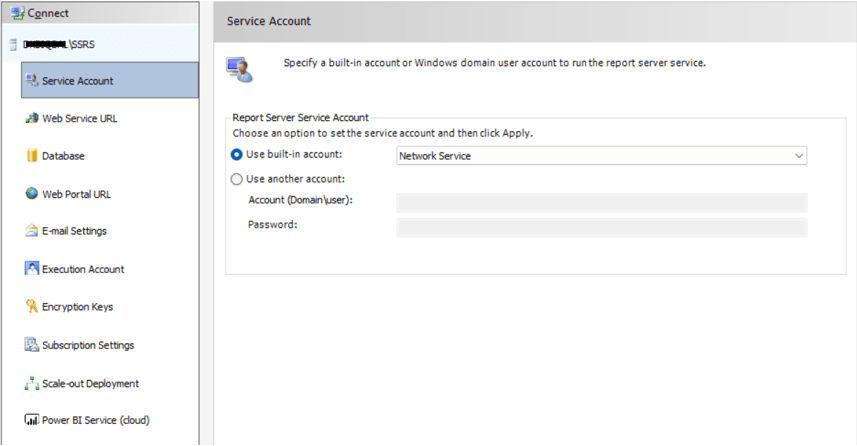
Step 4
Next click on the Service Account tab at the top of the left panel. The service account configuration window will be displayed. Here you will need to specify the account that will run the report server service. We will be using one of the built-in accounts “Network Service” here which upon selection will configure the service account.
Step 5
Click on the “Web Service URL” tab from the left panel. Now here you may configure the report server URL which will eventually be utilized to deploy the SSRS reports on the reporting server. You can set the ports as well (80 or 443 (SSL)) that the report server will use to host which will be displayed at the bottom of your settings. Once you click on the Apply button at the bottom of the page, the report server web service URL will be configured. You can also add multiple IP addresses/identities by clicking on “Advanced…” which will allow you to add, edit & remove identities for your reporting service.


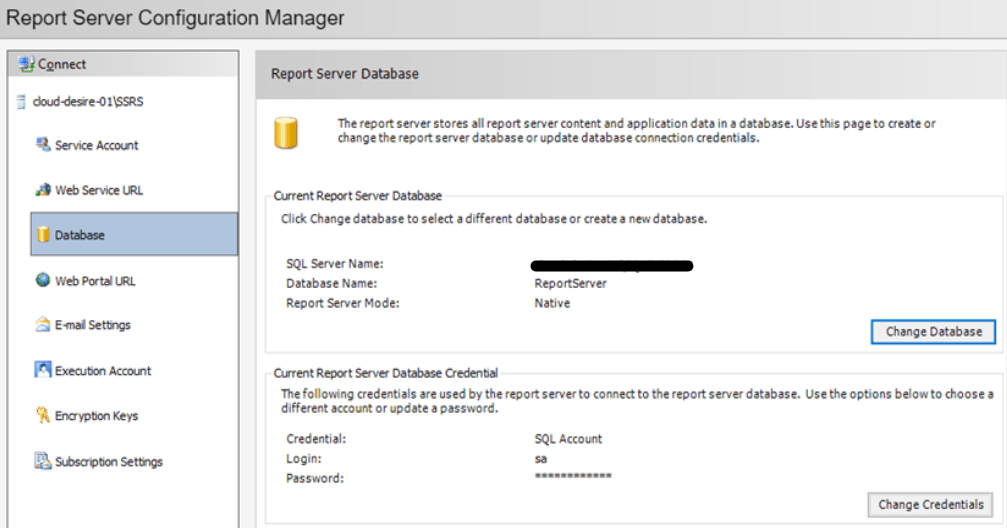
Step 6
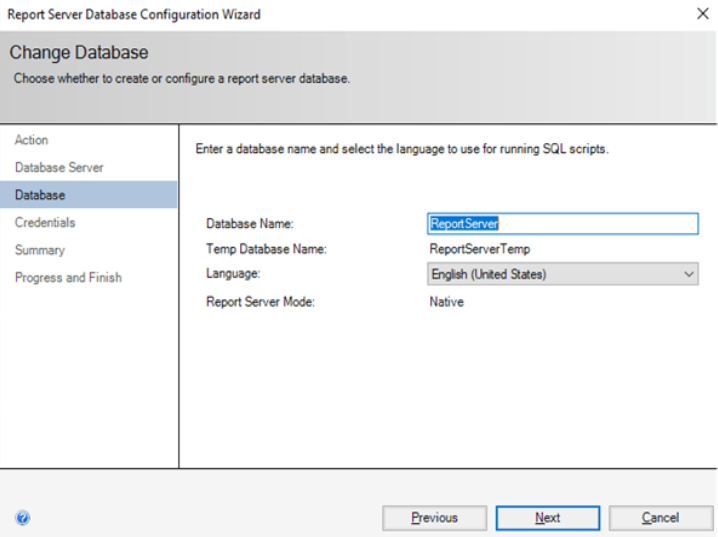
Click on the “Database” tab from the left panel. Here we’ll set up the database for the report server. Click on the “Change Database” button.
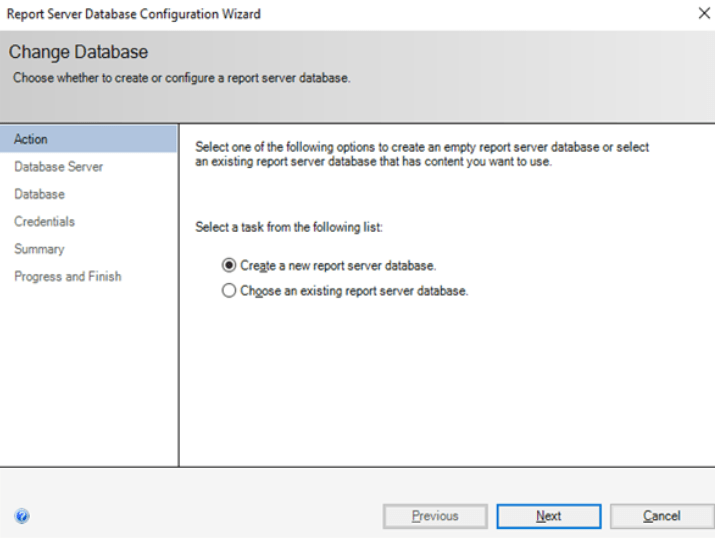
The Report Server Database Setup Wizard will appear. Although we will be creating a new database this time, you can also configure an existing database for the report server if you already have one. Click Next after selecting the first option as shown below:
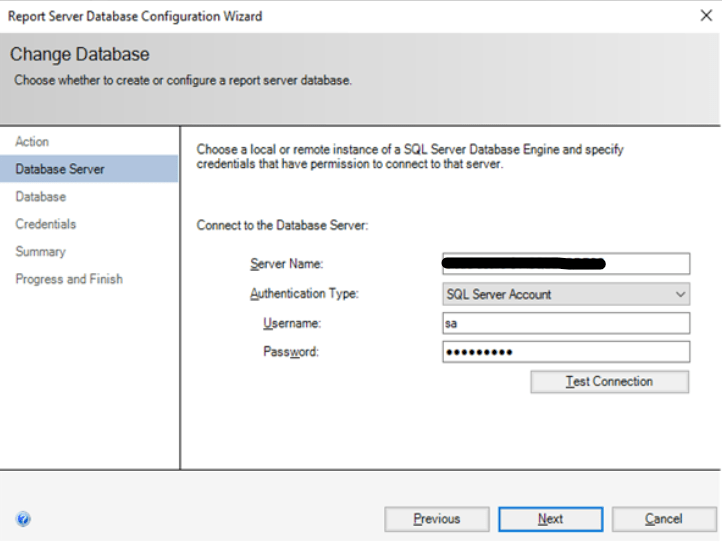
Now provide the information for the SQL Server instance where you wish to create the database for the report server. We will go with local instance for now and use the SQL Server Account authentication. Click the “Test Connection” button and if the test is successful, click on Next.
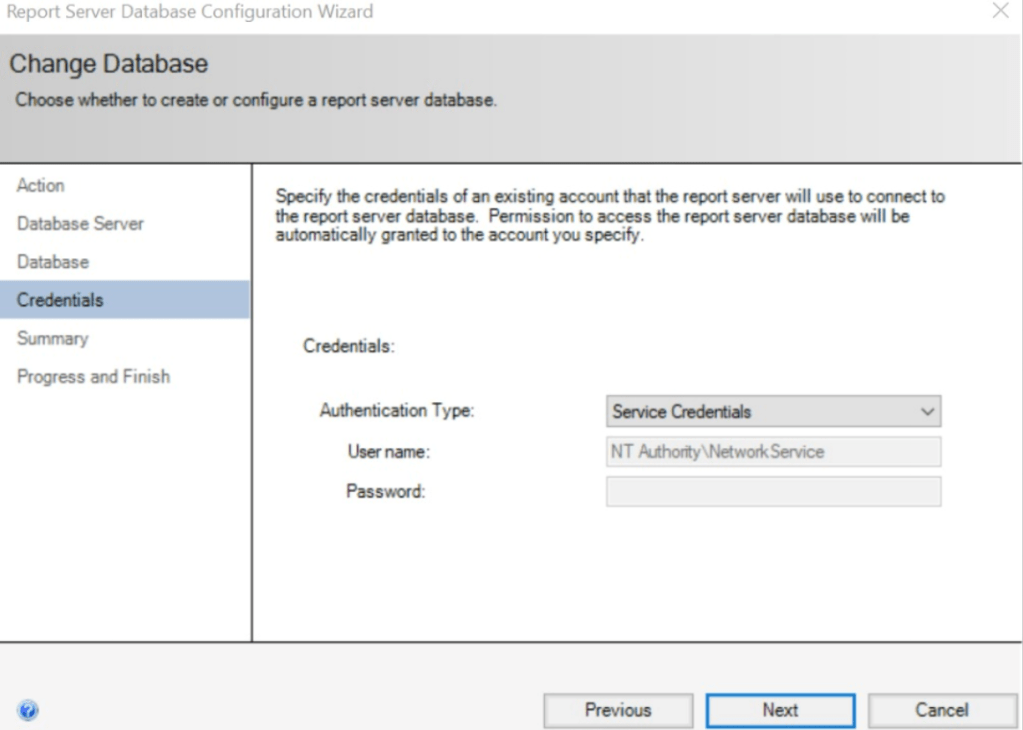
Now specify the server name and then enter the credentials to connect to the report server database. Then click Next.

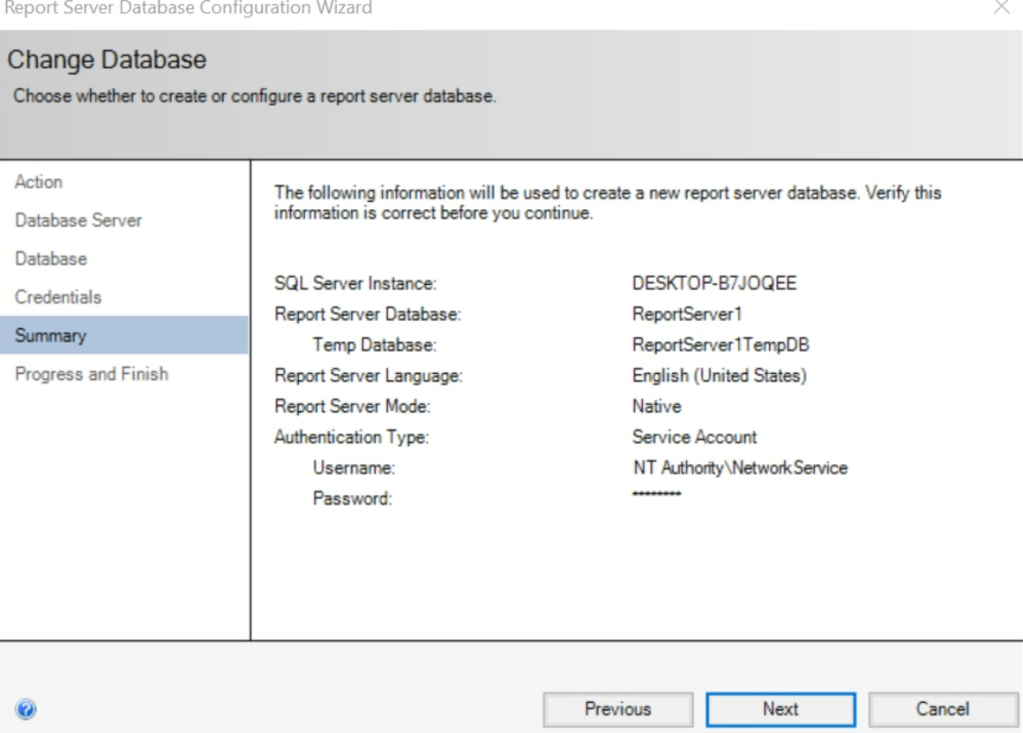
After you click Next, you will see the summary of the settings & inputs you provided. You may use this to verify your details and then click on Next.

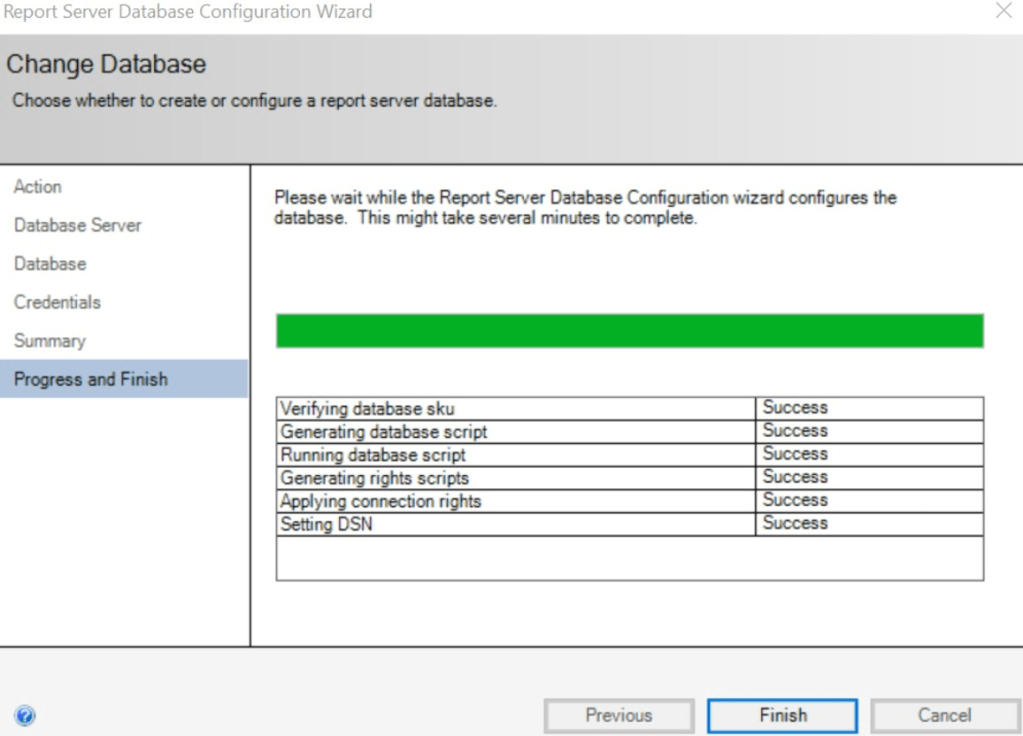
This will configure the report server database. Once all the steps are executed successfully as shown below, click on the Finish button and click on the Apply button to finalize your database configurations.

Step 7
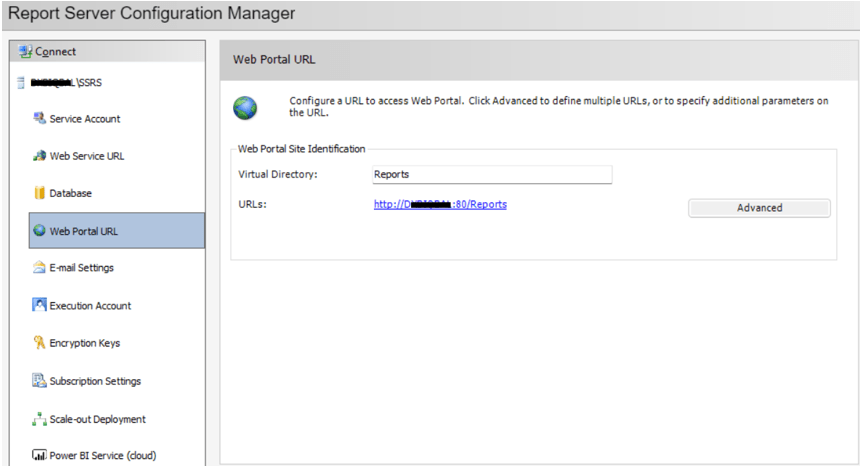
Click on the “Web Portal URL” tab from the left panel. Your web portal URL can be set up at this point which will then be used to manage SSRS reports, data sources, report parameters etc. The URL link will be visible and if we simply go with the the default settings, our report server web portal URL will be configured after clicking on the Apply button.
Step 8
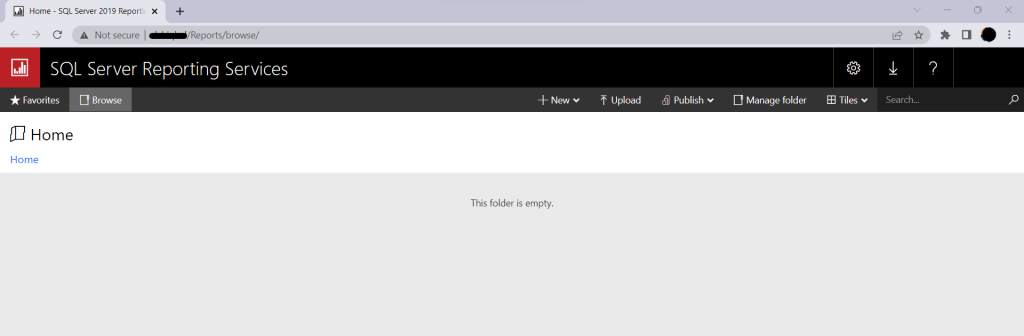
Now open the browser and enter the URL which we configured in the Web Service URL section in step 5. You should see the following web page with all your details.
And this way, we complete setting up SQL server reporting services which is now ready for deploying & managing reports and various data sources; and this can be achieved using MS Visual Studio or Report Builder tool.
Hope you found this article informative!
